Part Two: Recipe for an Obstacle Course!

In my last blog post, Lauren Stern OTR/L and I discussed the art of obstacle courses in order to address the individualized therepeutic goals for a child.  Obstacle courses are a great way to work on your child’s strength, balance, coordination, motor planning, handwriting, and fine motor skills while providing a variety of sensory input to his/her body.  Here is another recipe that incorporates handwriting skill development and generalized strengthening.

Don’t forget about the different secret sensory ingredients you can add to any obstacle course to meet your child’s sensory needs.


A Spectacular Sentence Salad

Once children have mastered writing letters, they are expected to begin forming words and sentences.  Elements of legible handwriting  include appropriate spacing of letters and words, placing letters on lines, and sizing of letters.

Serves:  School aged children 

Ingredients:

Large tactile bin (check out these fun ideas)

Magnetic plastic or foam letters

Tunnel to climb through

Couch cushions or large pillows (optional)

Lined paper (I like Hi-Write paper for K-1 or 2nd grade + to help with sizing of letters)

3-inch binder or slant board for writing surface

Pencil of preference

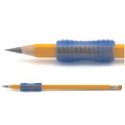
Pencil grip if needed

Plastic chopsticks (I like Zoo Sticks)

Directions:

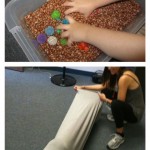
1. Hide the letter pieces in the tactile bin and have the child search with their hands (hiding their vision will make this more challenging!)

This is great for tactile discrimination!
 

2.  Taking the puzzle piece the child crawls through the tunnel.

For an increased challenge of balance and strength, the tunnel can be placed on top of couch cushions. This is also a great way to add a secret sensory ingredient for heavy work and joint compression.
 

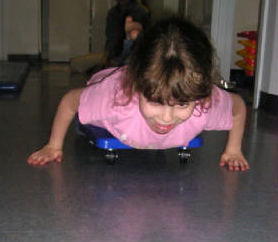
3.  While laying on their stomach on propped elbows, have child write a sentence, “One/Two word(s) that start(s) with the letter A is/are…”

This position works on shoulder stability. The paper is resting on the binder or slant board to promote a neutral wrist position.  Add on a pencil grip, if needed, to promote a functional grasp that will aid in motor control.  Be sure to encourage proper spacing, placement, and sizing of letters & words.
 

4.  To promote fine motor skills, using chopsticks the child will place the letter into a small bin.

5.  Last, wheelbarrow walk back to the starting point.   

Repeat steps 1 through 5

What are your favorite obstacle course ideas???


– Sari Ockner, OTR/L 
 
Thanks to Lauren Stern OTR/L for contributing her creative ideas to this post!


Part One: Recipe for an Obstacle Course!

Occupational therapists love to create obstacle courses because we can carefully engineer a fun way to address a child’s individualized goals.  An ideal obstacle course offers a balance between a child’s preferred activities and ones that offer challenge.  Providing various levels of opportunities for a child within an obstacle course makes hard work a fun experience!

Obstacle courses are a great way to address:

  • muscle strengthening
  • balance & coordination
  • motor planning
  • fine motor skills
  • ideation & pretend play skills

When putting an obstacle course together think of your child’s strengths and challenges. What are their sensory preferences?  Keep in mind the importance of incorporating heavy work and deep pressure activities, as these are the secret sensory ingredients that help children remain organized and on task.


SECRET SENSORY INGREDIENTS

The ingredients listed below are ones that are organizing and calming for all children, so they can be added into any obstacle course you are creating.

  • Steamroller!  The child lies on the floor on his belly and using firm pressure, an adult rolls a large therapy ball up and down his body for deep pressure input.
  • Heavy work! Moving heavy objects or putting away heavy things.  Incorporate lifting books, photo albums, bags of flour or sugar, newspapers, etc.
  • Animal walks! Crab walk, bear walk, or wheel barrow walk; all which provide intense joint compression.
  • Hide n Seek! Hide objects within a couch so the child needs to work to move and lift the cushions to find them.
  • Any sort of pushing, pulling, carrying, lifting, stacking, bending, crawling, creeping, stomping, clapping, marching, tugging, squeezing.


Below is one delicious recipe that focuses on the development of foundational handwriting skills.

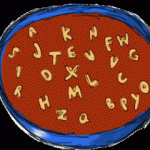
Capital Letter Soup

This recipe focuses on learning the proper formation of capital letters, which is important for the development of good handwriting habits. Both tactile and kinesthetic (use of body movement) experiences are incorporated to help learn the strokes of each letter.


Ingredients:

Couch cushions and/or blankets

Capital letters written on small index cards

Shaving cream

Dark colored construction paper to tape on wall

Big bowl of water

Hand towel

HWT CAPITAL FORMATION CHART

Serves: Pre-k and Kindergarten children

 Directions:

  1. Hide the letters under blankets or between couch cushions and have child search to find one.
  2. Using the letter picked, the child will jump on the floor in the proper sequential formation of the letter (remember: “always start your letters at the TOP!”).   **If your child needs a visual model to guide their movement make the letter for them with jump ropes or toilet paper.
  3. Have the child tip toe over to the wall where they will form the letter with their finger tip in shaving cream on a piece of construction paper placed just above shoulder height
  4. Child will then dip hands in a bucket of water and dry with a towel.
  5. Holding the child’s legs they will walk on their hands (wheelbarrow walk) back to the starting point. 

Repeat steps 1 through 5

Stay tuned for more fun obstacle course recipes!

— Sari Ockner OTR/L & Lauren Stern OTR/L
 
 Lauren Stern OTR/L  is a colleague and friend that lives and manages a private home-based occupational therapy practice in New York City, New York

Pencil Picks for Sensory Kids

Handwriting is a complex skill that can be very difficult for children with sensory processing challenges. Consequently, these children tend to avoid writing because it can be quite frustrating for them.  There are different types of writing tools that offer sensory solutions for these children to help make writing an easier task.  Here are some tools that may be helpful in exploring ways to best suit your child’s writing & sensory needs.

Mechanical pencils

Children with proprioception problems often have difficulty modulating the pressure they use on items.  If a child presses too hard when writing their hands fatigue quicker, mistakes are harder to clear away when erasing, and they are more apt to rip the paper (very frustrating!).  Mechanical pencils can aid to teach modulation of pressure, as the lead will break if too much pressure is applied.  Each time the lead breaks it will give the child feedback and the desired result is to help them monitor the pressure they are using.

Weighted pencils

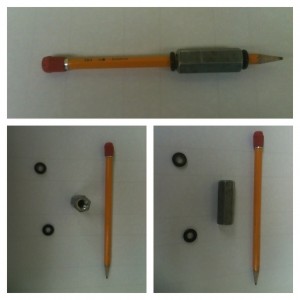
While some children with proprioception difficulties press too hard, others press too light when writing making their strokes very hard to decipher.  A weighted pencil can help to make their pencil steadier and give them the extra weight they need to press more firmly resulting in darker strokes.   There are pencil weight kits that you can purchase or you can easily make one from using rubber washers and rod shaped coupling nuts found in a hardware store for a few dollars.

Vibrating Pencils

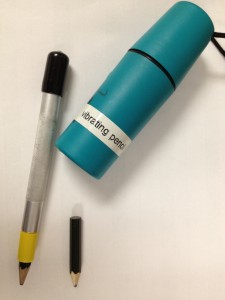
Children with low muscle tone generally have poor fine motor strength and have difficulties sustaining their grasp on a pencil, which impacts their written production.  Vibration is a sensory technique that can be used to “wake up” or stimulate muscles and allow for more efficient muscle use.  The vibration pencil also seems to entice children with sensory seeking behaviors, as it gives them sensory feedback to their fingers and helps to keep them focused on the task.  Based on my experience, the vibration pencil, more specifically the  Ark Z-Vibe*, has been so useful in motivating so many children to write.  I often recommend using for homework, as the slight buzz can be distracting to classmates.  On the flip side, the constant light hum (like white noise) can be somewhat soothing to the writer.  I have noted that children with tactile sensitivity have said it “tickles” their fingers and they do not prefer to use it.

Tactile Writing Tools

Tactile seekers love textures.   The three options below can help offer sensory feedback to satiate tactile needs during writing tasks by giving them textures right there on their own pencil.

Gel Squish Grips

Gel Squish Grips


Faber-Castell GRIP Writing Pencils

Musgrave Pencil Fidgets


Pencil Toppers

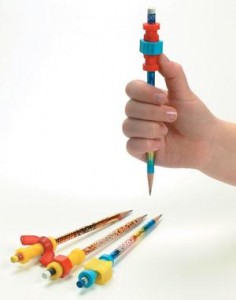
Some children seek intense oral input.  These are the children that chew on the collars or sleeves of their shirts, suck on their fingers, or bite off the eraser tips of their pencils.   The mouth is a powerful organizing center, just think of how a baby soothes himself by sucking on a pacifier. The actions of chewing, biting, and sucking are excellent ways to help increase focus and concentration and often decrease anxiety.  CHEW STIXX PENCIL TOPPERS  (BPA and Phathalate free) fit right on the top of the pencil and are an excellent sensory strategy to use in the classroom.


Considerations: Using writing tools that give sensory feedback can be very beneficial to a child with sensory needs.  It is, however, important to remember that physically holding a pencil properly with a comfortable, efficient grasp is fundamental to developing good handwriting skills.

— Sari Ockner, OTR/L

 
 * Please note that in addition to the Z-vibe you need to purchase the pencil attachment pack and batteries

Favorite OT Things!

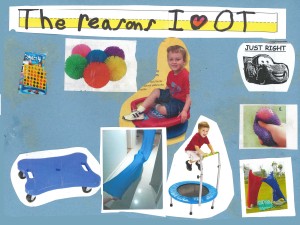
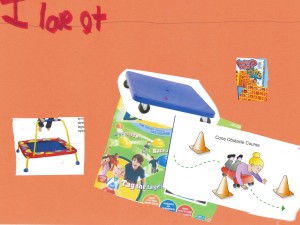
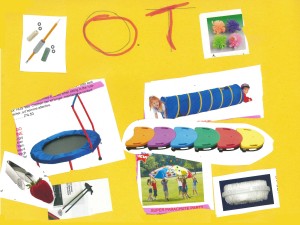
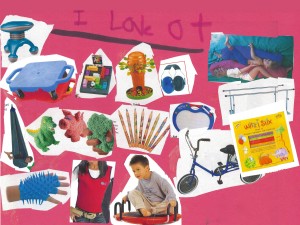
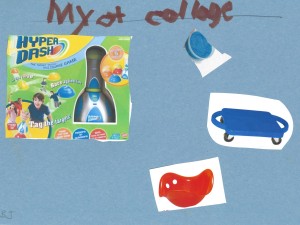
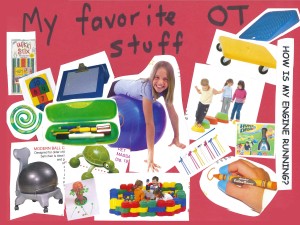
Social networking sites have been so helpful in finding new treatment ideas for the children I work with at school, home, and in the sensory-clinic.  There are so many amazing “tweets” and “shares” offering a variety of creative play ideas and craft activities.  Recently on Twitter, Parenthood.com (@ParenthoodCom) suggested homemade gift ideas for the holidays, one being collages.  My OT spin on this idea was to have children create a collage of all the things they like to do in their occupational therapy sessions.  I asked them to look through old therapy catalogs and pick the items that make them stronger or helped them write better, to find equipment they would put in their ideal obstacle course, and find their favorite games that we have played throughout the year.  If they could not find their favorites in the catalogs they were able to access Google to search for pictures of them.  It was a great way to work on ideation, visual perceptual skills, sequencing of a multi-step task, and obviously….fine motor skills.

The children all loved this activity and were excited to bring home their collages to show their parents.  Now their parents will see the specific therapeutic tools used in OT and have functional gift ideas for their children as they finish up their holiday shopping!

Check out these fantastic collages:


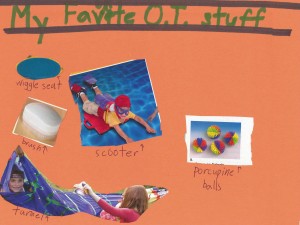
I wanted to make one too!

Here are some of my favorites:

-Sari Ockner, OTR/L

Hand Strengthening Activities for Children

There are many muscles that are responsible for the movements in the hand.  To be exact, there are a total of 34 muscles that move the palm, fingers, and thumb.  Our fingers actually do not have any muscles inside; their movement comes from the tendons of all the muscles in the palm and forearm.   Nine individual muscles control the thumb alone!   Many children naturally develop adequate strength in all of these muscles to learn the fine motor skills needed to manipulate toys, dress themselves, and use a pencil and scissors. There are some children however, that do not acquire this strength as easily and need extra attention to gain that necessary strength.

Here are some activities designed to help children with weak hand muscles and poor fine motor skills.

PLAY-DOH & THERAPUTTY

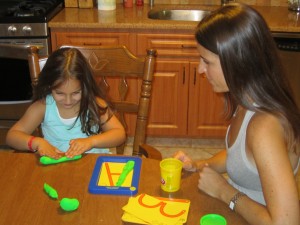
Play-doh is a great tool. Have your child knead it, roll into logs or small balls with their finger tips, squash it with open palms and use their fingers to mold it into a larger ball.  Use cookie cutters too!

You can even make your own:

1/4 cup salt

1 cup flour

1/4 cup water

Have your child mix the flour and salt in a bowl then add water. Knead and squeeze the dough to make a clay consistency. You may need to add more water.


Theraputty is more resistive than Play-doh; it comes in a variety of resistances ranging from soft to extra firm.  Hide small items (buttons, coins, beads, etc) inside and have the child pull it apart with their hands and fingers to locate the items. Roll the theraputty into a log and have your child snip it with scissors.  This activity can be graded by changing the thickness of the log or using varied levels of resistive putty; adapt according to your child’s abilities.

PINCHING ACTIVITIES

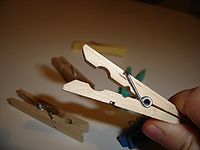
Tongs, tweezers, chopsticks, and clothespin activities use muscles for pinch strength in the hands and subsequently for the muscles used in holding writing tools properly. Always make sure a neutral wrist position and proper pinch grasp are used to maximize strengthening of hand and finger muscles. There are a variety of toys with tongs that can be purchased such as Wok and Roll and the Hungry Dog Motor Skills Game. There are also creative ways to come up with home-made activities such as the two described below.


Label clothespins A to Z and work on spelling words.  Clip them onto fabric or a “clothes line” hung slightly above shoulder height of child to incorporate wrist and shoulder muscles in this activity.


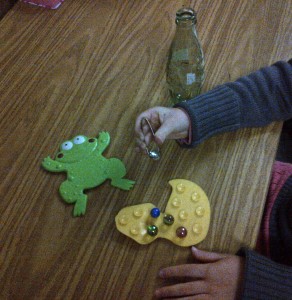
Use metal tongs or strawberry pickers to transfer marbles placed on the suction cups of upside down bathtub treads into a narrow mouthed bottle or container.


WEIGHT-BEARING ACTIVITIES     

When children crawl as infants the arches within the palm of the hand develop and strengthen.   These are the muscles that allow us to cup a dice and shake it within our hand.  Great activities to try with your child to develop and strengthen these arches are crawling on all fours through a tunnel or over uneven surfaces like couch cushions, propelling themselves in a prone position (laying on stomach) on a scooter board, and wheelbarrow walking.

SQUEEZING ACTIVITIES

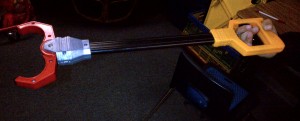
Squeezing activities may include use of a stress balls, large chip bag clips, crumbling large pieces of paper to make snowballs and have a friendly snowball fight!  Incorporate spray bottles and water squirt bottles to create chores for your child to clean the table after a meal and water plants.  There are a few hand grasp toys (see image below) that children love that can be used to pick up trash or toys during clean up time! 


Remember, stronger hands will lead to more independence in self-help tasks like opening food wrappers and manipulating clothing fasteners.  Strong hands and fingers will allow your child to play with a variety of toys and fun games that require the use of good fine motor skills. Lastly, good strength in hands and fingers will give your child the foundation to correctly hold a pencil and manipulate scissors with precision.

– Sari Ockner, OTR/L

 
Like Kidz Occupational Therapy on Facebook
Follow on Twitter @Sari_KidzOT

Autism & Early Intervention

Research shows that children as young as 12 months can show signs of autism.  Those of us that work with children with special needs are very aware of such signs but most parents are not.   Early detection of Autistic Spectrum Disorders (ASD) leads to early therapeutic intervention, which can make all the difference in a child’s future.

Parents, as you become familiar with the early signs or red flags associated with autism and have concerns about your child’s development, your concerns may warrant an evaluation to assess his/her present levels of development.  First, speak with your pediatrician or more specifically a Developmental Pediatrician who specializes in the identification of Autistic Spectrum Disorders. Then, familiarize yourself with the interventions an infant or toddler with autism may benefit from, including occupational therapy, physical therapy, speech & language therapy, nutrition services, special education, and/or behavior therapy.   Lastly, explore options in order to get your child evaluated and then to receive the necessary on-going services.  Such options may include applying for Early Intervention services that are funded through the state and/or seeking out the benefits provided by private health insurance companies.

The Individuals with Disabilities Education Act (IDEA) gives each parent the legal right to obtain support for infants and toddlers with disabilities through government funding.   Section C of IDEA clearly defines the parameters of Early Intervention programming.  A team led by a case manager facilitates the development of an Individualized Family Service Plan (IFSP).  Through the IFSP process, family members and service providers work together to plan, implement, and evaluate services.  The IFSP document is tailored to specifically meet the family’s concerns, priorities, and resources.  If you are unsure about agencies available in your community, contact your state’s lead agency in charge of the early intervention system.  To find your state’s lead early intervention agency, please refer to the “State Agencies” tab on the NICHCY State Resource Sheet.

There has been a lot of media attention on healthcare reform, both on federal and state levels, aimed to provide healthcare benefits for children with autism.  There are currently 37 states and the District of Columbia have laws related to the treatment of Autistic Spectrum Disorders autism and insurance coverage.  Familiarize yourself with current state statutes to see if these laws apply in your state of residence then contact your health insurance company to find out the coverage they provide for therapeutic services.

If your insurance company does not provide coverage for treatment of ASD, then speak with your pediatrician and treating therapists that have experience dealing with insurance companies.   Many children with autism present with diagnostic factors impacting their physical growth and health, such as hypotonia (low muscle tone), feeding difficulties, or dyspraxia.  If your pediatrician identifies such areas of need, then occupational therapy, physical therapy, and/or feeding therapy can offer specialized treatment and in-network coverage is generally provided.  If you choose an out-of-network service provider then a percentage of the billed rate is often covered. If you want to stay in-network with your insurance company and they do not have a suitable therapist, they may pay for complete out-of-network costs.  It is always worth asking.

If you are a concerned parent of an infant or toddler that may have signs of autism….ask questions, do research, and be assertive to get the early intervention needed to build a strong foundation for his/her transition into childhood.

– Sari Ockner, OTR/L

 (updated on 12/8/12)
 
Like Kidz Occupational Therapy on Facebook
Follow on Twitter @Sari_KidzOT
 

In-Home Sensory Items You Can Create or Find on the Cheap

If you are a parent of a child with special needs, the thought may have crossed your mind as to how you could create a fun, effective and sensory rich environment in your home. Space and budget are often reasons that may hinder families from doing so.  The great news is that there are so many creative and affordable sensory solutions to bring much needed sensory input into your home.  The suggestions provided below can help your child with sensory processing and modulation difficulties to better regulate their arousal state and activity level.

Ball Bath

A ball bath is a classic, effective sensory “must have” when creating a sensory space! There are multiple sensory benefits a ball bath provides, as it can both ignite a child’s senses with the bright colors and sounds created from “splashing around” and at the same time calm them down by offering a wonderful tactile experience.   While the bigger ones sold by therapeutic equipment retailers are ideal (especially for your bigger, more active children), they are quite expensive.    A low cost option is to fill an inflatable kiddie pool with balls (there are different varieties depending on the space you have available).  I found one inflatable called a Jump-O-Lene with a base that offers some spring like a trampoline.    So now, your standard multi-sensory ball bath has become a more satisfying sensory experience, as we have added some bounce bringing vestibular (movement) and proprioceptive (body position) input into the mix!
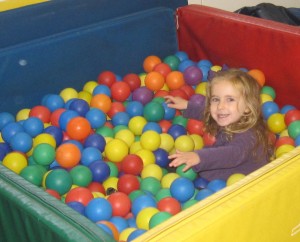
One thing to know ahead of time…balls will NOT remain contained in the ball bath when your child is playing.  Without fail, they will be all over the room!  If you, as the parent, do not want to deal with the mess, here are two cool strategies to entice your child to do the cleaning deed him or herself.  There is a contraption called a snow ball maker that allows the child to collect the balls that fly out of the pit to make for a fun clean up and also promotes bilateral coordination and motor planning. Speaking of fun, place a small basketball net above the pit and the child can try to make hoops, as they gather the stray balls from around the room.  Lastly, ball baths can get a bit icky. The easiest way to clean is to remove the balls and place them into large mesh laundry bags. Then take them outside and hose them down while in the bags and leave them outside over night to dry.

Crash Clouds

Crash Clouds or crash pads offer different therapeutic benefits.  Primarily a dense crash pad offers a safe place for the child to jump and crash to satiate sensory seeking behaviors.  Huge benefits of crash clouds are that they are HEAVY!  Hide toys under the cushions so your child has to lift in and crawl under or have your child pull it over to the other side of the room.  Heavy work, which is pushing or pulling heavy loads, is essential for children that have difficulty regulating their arousal states.  These are the kiddos that are crashers and jumpers and have an extremely hard time sitting still.  Heavy work, a form of proprioceptive input, is a sure shot to help calm their neurological systems down. An additional benefit is that all of this heavy work is it is a fantastic way to strengthen muscles.

On therapy websites and catalogs crash pads start in price (with removable covering for washing) at $395.00.   You can easily make one at home for less!  You will need:

  • Two duvet covers that you can buy from a discount store
  • Foam cushions scraps that you can buy for CHEAP from a furniture store

Fill the first duvet with all the cushion pieces and fasten it.  Then place the second duvet covering it so that you can easily remove the outer layer to wash!   When picking the outer cover color stick with grays or dark colors like navy blue, as they are more calming. If you are good with sewing you can do even cheaper by sewing sheets together leaving one of the four sides open and adhering fasteners (Velcro ®, large buttons, or a zipper).

Resistive Tunnel
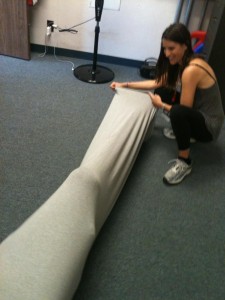
Resistive tunnels are the best kept sensory secret with which parents are not all quite familiar.  These tunnels are made of soft, stretchy fabric.  They provide total body pressure that not only feels good but also builds strength, body awareness, balance, and coordination as a child crawls or walks through.   The more resistance and heavy work load as the child pushes himself through the better!  My favorite is the Fish Tunnel from Abilitations but you can certainly make it cheaper by using 6 to 8 feet of stretchy fabric bought from a fabric store such as Joanne’s Fabric & Craft Store. Fabrics that work well are ribbed cotton, Lycra ®, and the material used to make bathing suits.  Use a stretch stitch on your sewing machine and sew the fabric the long way and keep the gap open on both sides 22″ to 26” depending on the size of the child.  There are also cheaper ready-made options out there if you do your research (OK, I did it for you…click here)

Tactile Tent

Children are naturally exposed to a variety of tactile media (i.e. grass, glue, finger paint, sand, fabrics, etc) in the development of normal tactile processing.  Sometimes children will not engage in messy tactile play because they are defensive or hypersensitive. It is then essential to find creative ways to introduce these to them.

Quiet spaces for our sensory kids are optimal.  A tent can serve many purposes but for now I am recommending that you create a Tactile Tent.   Inside you can make bins (under bed boxes work well for this) of different textures including, but not limited to, beans, rice, or Moon Sand.  Such tactile media is great for the tactile defensive or hyper-sensitive child. You can expose them to different textures slowly to increase their tactile exploration in a non-threatening, fun setting. Eventually you can upgrade to messier textures like shaving cream.
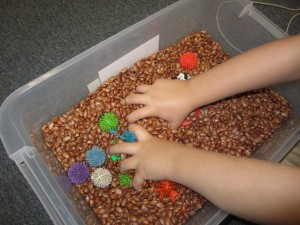
For your tactile seeking child, this tent is their heaven! They can explore all different rich textures and keep it all contained so it is not all over your home!  Keep a small dustpan and brush close by and the child can learn to sweep up his mess.  This makes for an excellent bilateral hand skill activity!

Office Chair

A great, effective way to give your child rotary movement, a form of intense vestibular input, is as simple as an office chair that spins!  If you do not already have one then a Dizzy Disc, Sit n’ Spin, or a Bilibo® are great low cost options if your child is one that seeks out intense rotary movement.  An important and helpful tip, if your child typically gets increasingly active following such intense movement activities make sure to engage him/her immediately after in some sort of modulating sensory activity like heavy work or deep pressure touch.

Trampoline

When thinking of practical sensory equipment for your home, it is hard not to mention a trampoline.  A trampoline offers a perfect balance of vestibular and proprioceptive input.  There are so many affordable ones out there. Personally, I prefer one without a stability bar because the child has to use more core strength to jump higher.  That being said, if the goal is to provide an opportunity for intense sensory input the bar allows the child to compensate for muscle weakness by providing a base of stability for them to jump high and hard!  Pure Fun makes a small trampoline that has a removable stability bar.


There are so many affordable and creative ways to implement rich and often needed sensory solutions in your home.  These are just a few fun ones to explore with.


 – Sari Ockner, OTR/L


Shop for sensory items on amazon.com in Sari’s Bag of OT Tricks – Sensible Sensory Solutions


Like Kidz Occupational Therapy on Facebook
Follow on Twitter @Sari_KidzOT

Five Practical Sensory Strategies for the Classroom

Children with special needs very often present with sensory integration difficulties, where their neurological systems are not organizing and responding appropriately to the multitude of sensory information that is entering their system.  Intact sensory integration is important for all activities a child does, especially participating and being available for learning in a classroom environment.  When a child’s sensory system is dysregulated we may see behaviors such as hyperactivity, poor attention, low arousal/energy, emotional outbursts, or inappropriate social interactions.  Many of these children are in classrooms of twenty-five students (or likely more ) with one teacher.  How can we support these children in school to better ensure their sensory needs are met in order to be successful students? Working in collaboration with teachers I have found these strategies to be effective and practical in general education settings.

1.  Seating Chair

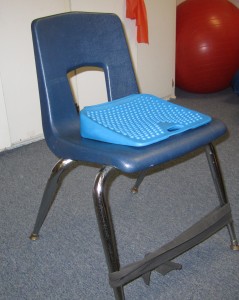
Two traditional sensory strategies that may promote in-seat behavior and attention to task are wrapping heavy resistive Theraband ® around the legs of the student’s desk chair and/or using a wiggle seat (wedge or disc, depends on student’s preference).  The Theraband ® allows the child to kick and bump it with their legs, which provides a  great amount of proprioceptive input (input to muscles & joints) that help with both body awareness and modulating their arousal level.   A wiggle seat allows for movement and can be considered similar to the use of sitting on a therapy ball that research has shown to improve attention by helping to maintain an optimal level of arousal to enable more effective learning.  Last, chair or desk push ups are great, especially before writing assignments.

2.  Movement in the Classroom

For children that really crave movement, while the above strategies at their desk can help they will likely need more input to regulate their bodies.  Functional movement breaks that can help organize a child could include taking a walk to the water fountain or giving the student the opportunity to pass out text books to classmates (movement & heavy work).  A teacher I work with told me of a student that needed frequent movement and she made it his daily job to help hand out worksheets to his classmates.  This child also presented with fine motor difficulties that made handling the papers difficult, so each morning he was asked to pick a helper to walk around with him and hand him a worksheet that he then placed on each student’s desk.  All the children really wanted to be his helper, so not only did this task give this student much needed movement but also encouraged social skills!

3.  Snack & Lunch

The mouth is an organizing center.  Think of a crying infant and how sucking on a pacifier or their fingers can be very soothing and self-regulating.  Sucking, chewing, and biting resistive food items can be very organizing for sensory kids!  First, I encourage teachers to allow children keep a water bottle with a straw at their desks, sometimes a little lemon or mint in the water can help to increase arousal.   Parents, when packing your child’s lunch box throw in a wide mouthed straw for them to use to eat their apple sauce or yogurt.  Chewy foods like dried fruit, turkey jerky, and bagels provide great oral proprioception.  Chewing gum during instructional class time if the school allows can be very effective too.   Crunchy foods like carrots, apples, large croutons…think of items that the child really has to really bite and chew and that won’t easily dissolve in their mouth.  The crunchier the more sensory input!

4.  Recess Time

Sometimes our kiddos with sensory challenges that can not self-regulate present with perceived negative behaviors in the classroom and often face consequences.  Please, please take note that taking away recess should never be a consequence for these children.  These are the children that NEED movement breaks to perform better in class.  During recess, encourage these students to engage in climbing activities, the monkey bars, and the swings to satiate their individual sensory needs.

5.  Hands On

Some students do really well when when they have an opportunity to touch something and keep their hands busy.  I love the idea of felt or Velcro ® strips adhered to the inside of a students desk and they can touch this throughout a lesson and it is not distracting to others.  In theory, fidget toys are great but can often be quite distracting to the student using it and to his classmates around him.  My advice, experiment with a fidget toy but be prepared it may not work for the reasons I just mentioned.  Having a small bottle of lotion (maybe lavender scented which is a soothing scent) in their back pack or desk can also be used at times.  This is especially useful for those sensory seeking students that often touch everything and at times others around them.

Parents, how can you ensure that these strategies are in place for your child?
  • Communication with your child’s teacher is key.  Ask questions!!!
  • If your child receives occupational therapy outside of school I would strongly suggest the school team and your outside OT collaborate to discuss your child’s sensory needs.
  • On an Individualized Education Plan (IEP) sensory strategies that are effective for your child can be incorporated under Accommodations & Modifications to legally ensure they are implemented by the school staff (i.e. use of a wiggle seat, movement breaks, chewing gum, etc).

What sensory strategies help your child or students get through their school day?  Share your ideas below!


– Sari Ockner, OTR/L

Please refer to these two studies that support the use of wiggle seats and therapy balls to help with increased attention in the classroom.
1.  Seating That Makes ‘Sense’:  A Sensory-Based Classroom Technique
2.  Classroom Seating for Children With Attention Deficit Hyperactivity Disorder: Therapy Balls Versus Chairs
 

Shop for sensory items at Sensible Sensory Solutions – Solutions for School

 
Like Kidz Occupational Therapy on Facebook
Follow on Twitter @Sari_KidzOT

Five Strategies to Improve Pencil Grasp for School-Aged Children

As a school-based occupational therapist, I am often approached by teachers that are concerned about students that have awkward or inefficient pencil grasps.  It is important to try to modify the pencil grasp early in a child’s school career because it will be harder as they get older to break poor habits.

Tripod Grasp

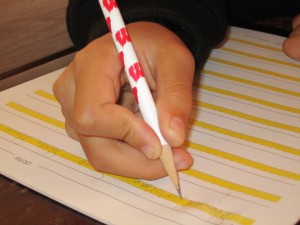
The most efficient way to hold a pencil is the dynamic tripod grasp where the pencil is positioned between the thumb and index finger with the pencil resting on the middle finger. Another functional grasp is the quadropod grasp where four fingers stabilize the writing implement and the pinky is curled in towards the palm.  In both of these grasps, there should also be an open web space (thumb and index finger form a circle) that allows for small movements in the child’s hand.

While a dynamic tripod grasp is optimal, there are many other grasp patterns that are commonly seen in children and it does not always require intervention or modification.  If the child is writing neatly with appropriate speed and pressure, but does not have that perfect tripod grasp, then my advice: If it ain’t broke, don’t fix it!   You can certainly try the tools below but do not force a change if it is not needed.

Please keep in mind that there are many, many activities to promote a proper tripod grasp.  I have just narrowed it down to five of my personal favorites that have often proved effective and that children seem to really enjoy.  These tools are all easy to implement at home or in the classroom.

1. Toys With Tongs

Toys with tongs and tweezers encourage the use of the thumb, index and middle finger while working the tiny muscles in that nook between the thumb and index.

Make it at home: Use strawberry pickers to pick up marbles and place into a narrow mouthed bottle or place each marble on the suction cups of upside down bathtub treads.


2.  Vertical Surfaces

Working on a vertical surface builds strength and stability in the arms and shoulders.  It also places the wrist in a good position for writing.

  • Easels
  • Chalkboards
  • Dry erase boards
  • Paper taped to the wall slightly above shoulder height

3.  Keeping It Small!

Smaller writing implements naturally encourage a proper grasp.  

I really like the Twist n’ Write Pencil, as it is small and sets the fingers up really nicely making for an easy transition to a standard pencil. 

4.  Pencil Grips                   

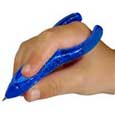
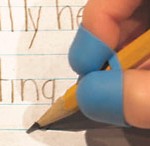
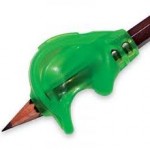
Pencil grips are a nice way to teach a child’s hands a new motor plan on how to set up their fingers to control their pencil better.  

Two of my favorites are The CLAW & the Grotto Grip

The CLAW Pencil Grip

Try the CLAW when four or five fingers are rested on the pencil shaft, as this pencil grip will only allow the tripod fingers to hold the pencil. Sometimes children place all their fingers on the pencil because they have a hard time dissociating the pinky (ulnar) side from the thumb (radial) side of the hand.  A great strategy to train their muscles is simply having them hold a marble or small object in their ring and pinky fingers against the palm while holding the pencil with their three free fingers…TA DA, we have a tripod!!!

Grotto Grip


Try the Grotto Grip when the pencil is held in a tripod grasp but with the thumb wrapped tightly over the index finger OR tucked under, both limit more efficient movements of the thumb and tend to fatigue the muscles in the forearm.


5.  Bubble Wrap! 

Yes, so simple but so effective.  I like the large bubbles for this activity.  Have child pop the bubble using their tripod fingers.


 Just a few strategies to help facilitate a proper pencil grasp from my good ‘ole Bag of OT Tricks!


– Sari Ockner, OTR/L 

Most toys and related items can be found for purchase in my Amazon.com store by clicking on each of the highlighted links above or see the whole store by clicking here
 
Like Kidz Occupational Therapy on Facebook
Follow on Twitter @Sari_KidzOT

The Ergonomics of a Child’s Work Space

I walked into a classroom last week, a progressive classroom of mixed grades and ages that meant children of mixed sizes. The particular 7 year-old student that I was working with was sitting in an almost adult sized chair, the same seating that was more appropriate for his older and taller classmates. Needless to say, his feet were dangling in the air and the table top was too high for him.

When it comes to positioning our kids at their desks please know:

One size does NOT fit all!

In 2004 Smith-Zuzovsky and Exner conducted a study on the effects of seated positioning on object manipulation skills (i.e. pencil use, scissors). Their findings suggested typical developing 6 – and 7 – year old children’s fine motor skills were affected by the quality of the child’s seating. So, when it comes to our special needs kids, many of which present with low muscle tone, decreased endurance, challenges with body awareness, and attention issues they are faced with a bigger struggle when they do not have the appropriate supportive seating at their desks. Physically their bodies are exerting much more energy to just sit upright in their chairs and pay attention in order to complete the required work.

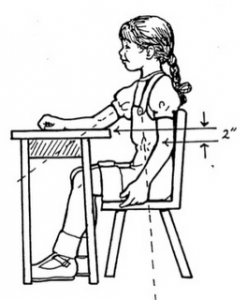
As an occupational therapist, I find it is important (and often overlooked) to first address the ergonomics of a child’s workspace when starting treatment .   The first thing to look at when assessing a child’s workspace is how they are sitting on their chair.  Think 90-90-90. Ninety degrees of hip flexion, ninety degrees of knee flexion, and feet flat on floor with ankles at a ninety degree angle. The desk surface should be at about 2-3 inches above their elbow (measure when elbow is bent down along the side of their body) and their shoulders should be relaxed.

Parents, as you may see at home, some of our kids get tired during homework, their work is messy, and it can be challenging to get the work completed. Let’s look at their workspace. Are they sitting at a high counter top on a bar stool? Or an adult-sized desk? If so, think about modifying his/her environment.  Place a wooden stepstool, phone books (I usually bind them with electrical tape to make them sturdier) or a milk crate under their feet to create a stable base.  If the tabletop is too high then try placing an air wedge cushion or folded towels on the chair to lift your child so they are in a more comfortable position in relation to the surface of the table.

For the home setting, I almost always recommend the adjustable table and chairs from Community Play Things to set up in a quiet area conducive for homework. The great thing about this table is that it will grow with your child.

Let’s set our children up for academic success by starting with good positioning in their workspaces!

– – Sari Ockner, OTR/L
 
Like Kidz Occupational Therapy on Facebook
Follow on Twitter @Sari_KidzOT